Showing posts with label babies/toddlers. Show all posts
Friday, February 28, 2014
J's first week of school
J's first week at school FINALLY ended! It had been a LONG and tortuous week for all of us at home.
We started his first week already not on a very good note....On his first day, we arrived at 8.30a.m., we were greeted by the school's admin staff...who told us to go to one of the classroom for him to have breakfast. It was CHAOTIC in the classroom...kids running around, talking...some eating their breakfast on their own at the tables. And to make things worse, we did not even know who his form teacher was going to be. I was allowed to accompany him for the first 3 days and he seemed pretty happy.
The first day went by quite fast coz it was just half day and we took him home slightly after lunch.
The second day was ok...except that J almost fell into the deep pool (1.8m deep) while having waterplay time because his teachers didn't notice him running out of the "allowed" play area and off to the deep pool. I could not have imagined what would have happened should I have not been there. To us...that had been an issue and we started to question if the teachers were even experienced looking after kids that young.
The third day was when it all went out of control...J was resisting being in the toilet for diaper change and he ran out of the toilet on his own. AGAIN...no teacher went after him but ME! At that point....I think I just totally lost it! I was really upset with the way the teachers are managing the kids...especially with only 4 kids at that moment. To me...that was the issue. If you cannot manage 4 kids now....I cannot imagine what the situation is going to be like with 4 more kids joining the class in a few weeks' time.
I had to speak with the Principal. Later, I found out that J's form teacher is not experienced with kids in pre-nursery as she had been with the nursery level for the last few years. As a school....shouldn't they be putting someone more experienced at this level since they are the youngest group of children (apart from the infants) who probably need more delicate care and teachers who know how to manage them especially when they are new to the school environment!
Then, everything just went downhill from there. I started to blame myself for putting J in the CC. I was also telling my hubby maybe he's just not ready for school or the school's program is just not as engaging to J as being at home. ALOT ALOT of "MAYBES" went through my mind for the entire week!
We thought that we had prepared him quite well for what to expect...we read him books about school and the fun things he will get to do in school, we brought him for a walk in the school premise and also letting him put on his uniform for a walk at the void deck. We also walked from our home to his school on some weekends and letting him know that was where he was going to attend school at and the route we will be taking.
With all the preparation we had done with J, we didn't expect that he would react so adversely to being in school. It was as if his personality has changed...from a smiley toddler to a crying toddler! He was so reluctant to go into the school each morning and he was crying almost the entire morning EVERYDAY.
He didn't want to join in any activities, even his favourite play was not enough to make him feel comfortable and want to be there. It really pains me as a mummy to see him cry everyday at school...but I know we don't have a choice because there is simply nobody else at home who can watch over him while hubby and I are at work.
J basically spent the entire week being carried by his teachers all the time. Each day I dropped him off at school, I hang around to peek at him but it really pains me so much seeing him cry. On many occasions, I just wanted to take him home with me but I didn't.
I looked forward to taking him home with me everyday and it's so heart wrenching to see his eyes so swollen from the crying the whole morning and he just didn't seem happy at all.
All we hope for him is be happy to be at school! When Friday came, we were all so relieved that the week was finally over and he didn't have to go to school over the weekends. We just wanted to spend all our time with him, shower him with lots of love and just let him be happy!
We only hope J's crying is only temporary and it would be a better week, NEXT week.
Monday, January 20, 2014
Fish Baked Rice~ 1 serving, 250g
One of my personal favourite dishes is a yummy baked rice. While preparing J's dinner last weekend, I thought why not try something different, rather than the usual rice with dishes and soup.
Probably at his age, he's not so concerned with how the food looks, but rather how it tastes. Although using the same usual ingredients that J is familiar with, it's with a TWIST.
And yay! J loves it so much, he was asking for more! Initially, I thought he would not be able to finish the portion I prepared...but surprise surprise...he FINISHED all!
Having said that, many of my recipes shared on this blog are self-created or modified to suit the taste of my LO.
Ingredients:
100-120g cooked rice (this proportion will depend on how much your LO is currently eating)
Homemade pasta sauce ~ Check out this link for the recipe: http://jschronicle.blogspot.sg/p/simple-pasta-sauce.html
50-60g fish (I used threadfin. Other options: codfish, salmon, even meat)
1 small egg
1 tsp chopped onion
1 tsp chopped corn
1 tsp chopped carrots.
1 tsp chopped broccoli
2 slices cheese [I tried regular cheese~adults eat + Bega string cheese~J eats: see below for more explanation on the cheese.]
Method:
1. Heat some butter/olive oil. Sautee the onion, corn, carrot and broccoli until soft.
2. Preheat oven to 175 degrees C.
3. Add in the cooked rice. Beat an egg into the rice and vegetable mixture until cooked.
4. Put the fried rice into a small baking glassware, top with slices of fish and bake in oven for about 10 min or until the fish is slightly cooked.
5. Pour the homemade pasta sauce over the fish and top with cheese.
6. Bake in oven until cheese melts and slightly brown.
7. Leave to cool for a while before serving. Straight out of the oven can be scald LOs' tongue.
**Recipe is good for toddlers (1 yr old onwards...or if they can already chew rice well) & adults. For adults, add seasoning if you like and adjust the portion accordingly.
**As mentioned earlier, I used 2 different kinds of cheese: Regular cheddar & Bega String cheese. Overall, I found the texture of the regular one much easier to eat for J after baking as it still remains quite creamy. On the hand, the Bega string cheese turned out a little rubbery after baking (somewhat similar texture to mozzarella), which was a little difficult for J to chew & swallow. I had to remove the layer of string cheese while feeding.
**Recipe can be modified to have pasta instead of rice. For pasta, I would suggest, you mix together with the pasta sauce before putting in to bake.
**Hope ur LOs love it as much as mine did! :)
Probably at his age, he's not so concerned with how the food looks, but rather how it tastes. Although using the same usual ingredients that J is familiar with, it's with a TWIST.
And yay! J loves it so much, he was asking for more! Initially, I thought he would not be able to finish the portion I prepared...but surprise surprise...he FINISHED all!
Having said that, many of my recipes shared on this blog are self-created or modified to suit the taste of my LO.
Ingredients:
100-120g cooked rice (this proportion will depend on how much your LO is currently eating)
Homemade pasta sauce ~ Check out this link for the recipe: http://jschronicle.blogspot.sg/p/simple-pasta-sauce.html
50-60g fish (I used threadfin. Other options: codfish, salmon, even meat)
1 small egg
1 tsp chopped onion
1 tsp chopped corn
1 tsp chopped carrots.
1 tsp chopped broccoli
2 slices cheese [I tried regular cheese~adults eat + Bega string cheese~J eats: see below for more explanation on the cheese.]
Method:
1. Heat some butter/olive oil. Sautee the onion, corn, carrot and broccoli until soft.
2. Preheat oven to 175 degrees C.
3. Add in the cooked rice. Beat an egg into the rice and vegetable mixture until cooked.
4. Put the fried rice into a small baking glassware, top with slices of fish and bake in oven for about 10 min or until the fish is slightly cooked.
5. Pour the homemade pasta sauce over the fish and top with cheese.
6. Bake in oven until cheese melts and slightly brown.
7. Leave to cool for a while before serving. Straight out of the oven can be scald LOs' tongue.
**Recipe is good for toddlers (1 yr old onwards...or if they can already chew rice well) & adults. For adults, add seasoning if you like and adjust the portion accordingly.
**As mentioned earlier, I used 2 different kinds of cheese: Regular cheddar & Bega String cheese. Overall, I found the texture of the regular one much easier to eat for J after baking as it still remains quite creamy. On the hand, the Bega string cheese turned out a little rubbery after baking (somewhat similar texture to mozzarella), which was a little difficult for J to chew & swallow. I had to remove the layer of string cheese while feeding.
**Recipe can be modified to have pasta instead of rice. For pasta, I would suggest, you mix together with the pasta sauce before putting in to bake.
**Hope ur LOs love it as much as mine did! :)
Bite-sized Veggie balls
Ah....so here I am getting on with my batch cooking and trying out new dishes for J after almost 2 months. We are quite glad J is settled to being back home but having such an active toddler at home with no extra pair of hands makes it really difficult to prepare a meal without him screaming for attention.So batch cooking has always been a great solution for me!
That also reminds me that I need to start drafting his weekly meal plans so I know exactly what to prepare in huge quantities! :)
So, to start off...I modified a previously posted vegetable nuggets recipe using slightly simple ingredients and steps.
Ingredients:
2 medium potatoes
120g Japanese pumpkin
1 corn (remove from cob)
1/2 small yellow onion
pepper
plain flour
1 egg
breadcrumbs (I used the Korean breadcrumbs...basically any kind of breadcrumbs also can. I have tried using cream cracker crumbs before. The taste was so good but it's on the oily side, especially for little tummies... )
Method:
1. Boil potato and pumpkin until soft. Mash together.
2. Chop the corn and onion until fine.
3. Preheat oven to 180 degrees C. Mix the corn and onion together with the potato mixture. Season lightly with black pepper.
4. Take some mixture and roll into small balls.
5. Lightly coat with plain flour, then egg wash then dredge with breadcrumbs.
6. Drizzle with some olive oil and bake in the oven for 15-20 min or until slightly golden brown. Half way through baking, you may want to toast it around the tray a little to ensure all sides are nicely brown.
7. Leave to cool a while before serving. Can be too hot for LO when the veggie balls are just out of the oven.
**Recipe is good for toddlers (1 yr old and onwards) and adults. For adults, I normally fry then sprinkle some salt...hee. More flavourful mah! Original tastes as good too. :)
**Much healthier than store bought ones. All natural flavourings. And most importantly, you know exactly what goes into the food your LO is eating.
**To save time, make them in advance and store in a Tupperware to freeze w/o baking/frying. Cook only when you want to serve.
**Lastly, ENJOY!!
That also reminds me that I need to start drafting his weekly meal plans so I know exactly what to prepare in huge quantities! :)
So, to start off...I modified a previously posted vegetable nuggets recipe using slightly simple ingredients and steps.
![]() |
| Tada! Veggie balls.. |
Ingredients:
2 medium potatoes
120g Japanese pumpkin
1 corn (remove from cob)
1/2 small yellow onion
pepper
plain flour
1 egg
breadcrumbs (I used the Korean breadcrumbs...basically any kind of breadcrumbs also can. I have tried using cream cracker crumbs before. The taste was so good but it's on the oily side, especially for little tummies... )
Method:
1. Boil potato and pumpkin until soft. Mash together.
2. Chop the corn and onion until fine.
3. Preheat oven to 180 degrees C. Mix the corn and onion together with the potato mixture. Season lightly with black pepper.
4. Take some mixture and roll into small balls.
5. Lightly coat with plain flour, then egg wash then dredge with breadcrumbs.
6. Drizzle with some olive oil and bake in the oven for 15-20 min or until slightly golden brown. Half way through baking, you may want to toast it around the tray a little to ensure all sides are nicely brown.
7. Leave to cool a while before serving. Can be too hot for LO when the veggie balls are just out of the oven.
**Recipe is good for toddlers (1 yr old and onwards) and adults. For adults, I normally fry then sprinkle some salt...hee. More flavourful mah! Original tastes as good too. :)
**Much healthier than store bought ones. All natural flavourings. And most importantly, you know exactly what goes into the food your LO is eating.
**To save time, make them in advance and store in a Tupperware to freeze w/o baking/frying. Cook only when you want to serve.
**Lastly, ENJOY!!
Saturday, December 21, 2013
Singapore Fastest Toddler
It has been a long while since I last blogged. We were in Singapore earlier this month visiting grandparents and me catching up with some friends.
While we were in Singapore, I came across an advertisement about a toddler race...specifically competing for "Singapore Fastest Toddler". We signed J up for the competition although we knew he was unlikely to win because he only started walking about a month & a half before the competition. We attempted to "train" J for the race, but he was just not into it. He was putting things into the basket and taking them out. Hahah.... It was more for him to see other babies like himself and expose him to crowd. It was quite a CROWD!
As always, J is not afraid of the crowd at all. In fact, he was quite happy to see other babies racing in the earlier races. Soon, it was his race... RACE No. 8.
My mum and I got him ready for the race! When the whistle went, the other 2 babies on the other lanes started walking, taking the plastic fruit and bringing it across to the other end. And what was J doing? Oblivious that he was in the race, he started examining the textured foam floor mat and the sponge divider between the lane. It was quite a funny sight.
FINALLY, my mum managed to get him to take a plastic fruit from the basket! Yay...but he didn't come to me with it though. Instead, he held it tightly in his hand even though one of the officials encouraged him to walk on to me!!! It was such a cute sight!
So obviously he didn't finish the race but it was a fun experience nonetheless! :)
Some snippets of J at the race:
While we were in Singapore, I came across an advertisement about a toddler race...specifically competing for "Singapore Fastest Toddler". We signed J up for the competition although we knew he was unlikely to win because he only started walking about a month & a half before the competition. We attempted to "train" J for the race, but he was just not into it. He was putting things into the basket and taking them out. Hahah.... It was more for him to see other babies like himself and expose him to crowd. It was quite a CROWD!
As always, J is not afraid of the crowd at all. In fact, he was quite happy to see other babies racing in the earlier races. Soon, it was his race... RACE No. 8.
My mum and I got him ready for the race! When the whistle went, the other 2 babies on the other lanes started walking, taking the plastic fruit and bringing it across to the other end. And what was J doing? Oblivious that he was in the race, he started examining the textured foam floor mat and the sponge divider between the lane. It was quite a funny sight.
FINALLY, my mum managed to get him to take a plastic fruit from the basket! Yay...but he didn't come to me with it though. Instead, he held it tightly in his hand even though one of the officials encouraged him to walk on to me!!! It was such a cute sight!
So obviously he didn't finish the race but it was a fun experience nonetheless! :)
Some snippets of J at the race:
![]() |
| Pre-race. Mummy, give me the handphone! |
![]() |
| Grandma, you call me ah? |
![]() |
| Cleaning up! |
![]() |
| This mat quite nice to sit on, Grandma! |
![]() |
| This apple is mine! Y must give it to you?? |
![]() |
| I must careful while walking. |
![]() |
| What's this? |
Thursday, November 7, 2013
Our trip to Hong Kong
It's been awhile since I last updated J's blog. We just came back from our trip to HK and we sure had a lot of fun!
We have done ALOT of travelling with J before he turned 1, but this trip was his first overseas trip AFTER he turned one year old. Travelling with a lil one can be pretty daunting for many families but definitely not ours. My hubby and I enjoys travelling very much way before J was born. Even when I was 5 months pregnant with J, we went to Korea! (That's how much we love travelling that absolutely NOTHING can stop us from travelling...whee)
This trip was a little different compared to the other trips we had taken with J, simply because now he's slightly older and wants to exert his "independence"; wanting to crawl or walk in the cabin and almost anywhere possible.
I guess the experiences from the other trips before this helped us a lot and we knew exactly how to go about planning our itinerary, his meals, what to pack...sharing a few essentials below:
However, although we enjoyed ourselves very much, I would say HK is not exactly a very baby-friendly place to travel to as with Vietnam where we currently live. So I guess our daily experiences made us even more prepared for the toughest travelling challenges.
Most typical HK style cafes do not have any baby chair facilities. Unfortunately, even at big restaurants where there is baby chair, the building in which they are situated in do not have baby changing station. So if your family is planning a trip with your little one to HK, be prepared that you might have to do nappy changing on the floor outside the toilet area should your little one decides to do BIG BUSINESS halfway through dinner (as we experience during this trip). Not to say that we shouldn't be going to HK, but you just to be prepared for such situations and think it positive, so that the trip is enjoyable for everyone! :) Besides, who doesn't love HK...the FOOD especially!
Enough said about the trip...some photos of J having his fun:
We have done ALOT of travelling with J before he turned 1, but this trip was his first overseas trip AFTER he turned one year old. Travelling with a lil one can be pretty daunting for many families but definitely not ours. My hubby and I enjoys travelling very much way before J was born. Even when I was 5 months pregnant with J, we went to Korea! (That's how much we love travelling that absolutely NOTHING can stop us from travelling...whee)
This trip was a little different compared to the other trips we had taken with J, simply because now he's slightly older and wants to exert his "independence"; wanting to crawl or walk in the cabin and almost anywhere possible.
I guess the experiences from the other trips before this helped us a lot and we knew exactly how to go about planning our itinerary, his meals, what to pack...sharing a few essentials below:
However, although we enjoyed ourselves very much, I would say HK is not exactly a very baby-friendly place to travel to as with Vietnam where we currently live. So I guess our daily experiences made us even more prepared for the toughest travelling challenges.
Most typical HK style cafes do not have any baby chair facilities. Unfortunately, even at big restaurants where there is baby chair, the building in which they are situated in do not have baby changing station. So if your family is planning a trip with your little one to HK, be prepared that you might have to do nappy changing on the floor outside the toilet area should your little one decides to do BIG BUSINESS halfway through dinner (as we experience during this trip). Not to say that we shouldn't be going to HK, but you just to be prepared for such situations and think it positive, so that the trip is enjoyable for everyone! :) Besides, who doesn't love HK...the FOOD especially!
Enough said about the trip...some photos of J having his fun:
![]() |
| Waiting for our luggage@the conveyor belt... |
![]() |
| Our first meal in HK at a HK café..my hubby held J the whole meal while I fed him his lunch....all this happened while we were also trying to finish up our lunch. |
![]() |
| Baby chair available at Din Tai Feng |
![]() |
| On the ferry to Cheung Chau...the water behind was so attractive to J, he wanted to break free and go in to swim!!!*scary* [he LOVES swimming btw] |
![]() |
| Look what we found! A children's playground...although meant for kids between 2 and 5, we thought it was a good pitstop for J to come out of the carrier and 'roam' a bit. Such a cutie! |
![]() |
| hubby decided to rent a tricycle so J and I got a free lift!! It was so comfortable that J had to take a snooze while I enjoy the ride! |
![]() |
| while J's awake!! |
![]() |
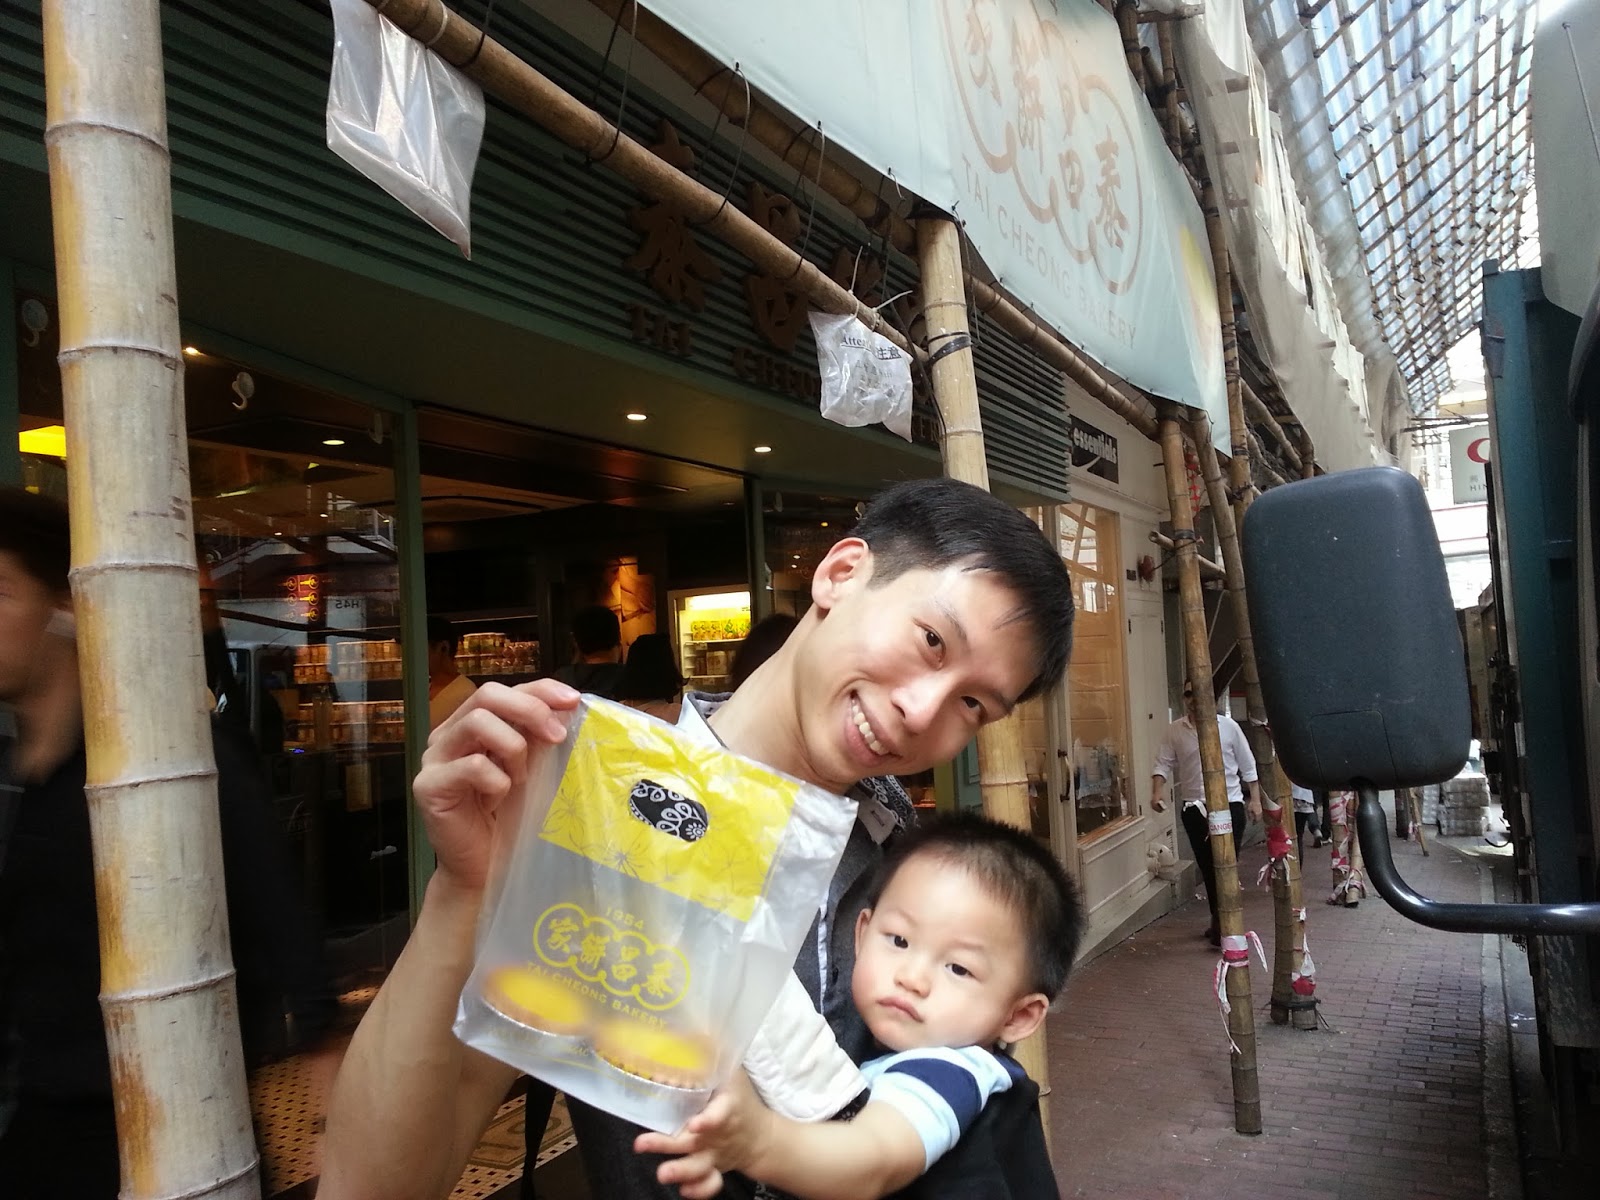
| Even J wants a bite of daddy's egg tarts!!! |
Friday, October 25, 2013
Shape Sorter Box
![]() |
| Jaeyen chose this Shape Sorter Box on his own |
At around 13 months, my hubby decided to take out the Shape Sorter Box we bought for J when he was turning 6 months old for him to explore.
A shape sorter box is a traditional educational game that I remembered playing a lot when I was younger and playing alongside my cousins then. Although it is a simple game of putting the correct shape through its cavity, we always challenge to see who can complete sorting all of the shapes in the shortest time.
It does not involve a lot of rocket science going through this activity, yet it brings a lot of learning opportunities for the little one. Some of which are as follow:
(1) Name of shapes - Basic ones [square, circle, triangle, etc], more complex ones like the one we bought [semi-circle, crescent, etc.]
(2) Cause and Effect - What happens when I put a shape into the cavity
(3) Colours - usually, the shapes come in different colours
(4) Promotes hand-eye coordination
Tried this with J quite a few times, but I think he is not ready yet. So far, he has only managed to sort 2 shapes (oval and circle) correctly but only did it once.
Although J doesn't play it correctly yet, he still gets a lot of thrill and fun from shaking the box. :)
---------------------------------------------------------------------------------------------------------------------
There are many shape sorter boxes available in the stores, a few types shown below:
![]() |
| 5 shapes shape sorter |
![]() |
| Wooden shape sorter |
![]() |
| Cookie Jar shape-sorter |
If you intend to get one for your LO, you might want to think about whether what you are buying is adequate for your LO's needs. For us, we wanted to go beyond just the basic shapes, hence we got one which had 9 shapes.
The wooden shape sorter box is good as it is durable and can last a long time. However, caution that when buying a similar product, you may want to check that the paints use are non-toxic. This to ensure that even when babies chew on the shapes, they are safe.
The cookie jar shape sorter is also interesting because it allows for independent play. There are various options for you choose. For eg, when it is switched to the shape function, it says the name of the shape when the correct one is put into the cavity. This one also teaches numbers (as you can see from the photo above; each shape is accompanied by a number).
Lastly, price is always a consideration when buying toys. Choose one that is within your own budget yet serves your purpose. I say this because there are way too many fun and educational toys out there and it's always tempting to want to buy them all for our LOs. :)
Sunday, October 13, 2013
Healthy Vegetable Nuggets~ 30-35 pieces
In search for more healthy yet delicious recipes for J, I came across the vegetable nuggets. I always hear of friends making chicken nuggets but not vegetable ones. So this one is quite a good idea. Especially for mummies with picky eaters....definitely an awesome solution to get them eating their vegetables and yet the little ones can enjoy their favourite food! :)
J is not a picky eater, but I make it a point to offer him different varieties of food! I made these after dinner last night and baked some for hubby and I to try. They tasted so yummy, just like any regular commercially-made nuggets. And the best part of it, there's no seasoning but all natural flavours. For the adults or older kids, serve them with some chilli sauce or ketchup, and it's PERFECT!!!
So......shall not let you wait further...Here's the recipe:
Ingredients:
3 medium potatoes
50g carrot (diced)
75g broccoli
75g corn (removed from cob)
Olive oil
breadcrumbs (alt: cream cracker crumbs or blended oatmeal mixed with breadcrumbs)
plain flour
1 egg
Method:
1. Boil potatoes until soft and set aside to cool. Steam corn, carrot and broccoli in a pot of boiling water for 10 min. Leave to cool.
2. Blend the steamed corn, carrot and broccoli until fine. Mash the potato and add to the blended vegetable. Mix well. You can season with some black pepper.
3. Spread the mixture out onto a baking tray until about 1 cm thickness. Chill the mixture in the freezer for about 20min.
4. After 20 min, take the mixture out and cut into desired shapes using cookie cutters (alt: I got lazy towards the end and just spoon some mixture in my hand and flatten to make into shape like usual nuggets) If you find that as you work the mixture, it gets soft, pop the tray back into the freezer for about 10min and repeat the process.
5. Preheat oven at 180 degrees C. Meanwhile, dredge the nuggets in flour, followed by the egg wash then finally breadcrumbs and lay them on a wired rack. [This is to ensure that both sides are crispy]
6. Drizzle a bit of olive oil on each nugget and bake for 15-20 min or until golden brown.
7. Serve immediately.
** This recipe is great for freezing. After dredging the nuggets, store them in an airtight container, laying the layers with a piece of plastic bag (to prevent the nuggets from sticking together). And bake them only when you want to serve. You could probably keep these in the freezer for a month or so! :)
**For serving to adults, you can add some salt or herbs to make them more flavourful.
Original recipe came from Weelicious Recipes.
J is not a picky eater, but I make it a point to offer him different varieties of food! I made these after dinner last night and baked some for hubby and I to try. They tasted so yummy, just like any regular commercially-made nuggets. And the best part of it, there's no seasoning but all natural flavours. For the adults or older kids, serve them with some chilli sauce or ketchup, and it's PERFECT!!!
So......shall not let you wait further...Here's the recipe:
Ingredients:
3 medium potatoes
50g carrot (diced)
75g broccoli
75g corn (removed from cob)
Olive oil
breadcrumbs (alt: cream cracker crumbs or blended oatmeal mixed with breadcrumbs)
plain flour
1 egg
Method:
1. Boil potatoes until soft and set aside to cool. Steam corn, carrot and broccoli in a pot of boiling water for 10 min. Leave to cool.
2. Blend the steamed corn, carrot and broccoli until fine. Mash the potato and add to the blended vegetable. Mix well. You can season with some black pepper.
3. Spread the mixture out onto a baking tray until about 1 cm thickness. Chill the mixture in the freezer for about 20min.
4. After 20 min, take the mixture out and cut into desired shapes using cookie cutters (alt: I got lazy towards the end and just spoon some mixture in my hand and flatten to make into shape like usual nuggets) If you find that as you work the mixture, it gets soft, pop the tray back into the freezer for about 10min and repeat the process.
5. Preheat oven at 180 degrees C. Meanwhile, dredge the nuggets in flour, followed by the egg wash then finally breadcrumbs and lay them on a wired rack. [This is to ensure that both sides are crispy]
6. Drizzle a bit of olive oil on each nugget and bake for 15-20 min or until golden brown.
7. Serve immediately.
** This recipe is great for freezing. After dredging the nuggets, store them in an airtight container, laying the layers with a piece of plastic bag (to prevent the nuggets from sticking together). And bake them only when you want to serve. You could probably keep these in the freezer for a month or so! :)
**For serving to adults, you can add some salt or herbs to make them more flavourful.
Original recipe came from Weelicious Recipes.
Tuesday, October 8, 2013
A Major Developmental Milestone~WALKING
At 13 months and 2 weeks, J decided he's going to start to walk. It's a moment we have all been waiting for. It is a major milestone and with it comes the bumps and falls. Poor lil J....He has been falling a lot since he started his "practices". It hurts me so much to see him cry every time he falls during his attempts. Yet, I know through these, he will learn to more careful and learn to pick himself up again on his own.
So here he is....attempting to walk in and out of the kitchen.
Now that J is starting to walk, it's about time to get him some proper shoes. I went online to see if I could pick up some useful tips on choosing the right shoes for him, so I thought it would be good for me to share it here too!
__________________________________________________________________________
What to look out for when choosing shoes:
Choose a breathable, lightweight material. Soft leather or cloth is best. Avoid stiff leather shoes, which can hinder foot development, and synthetics, which don't breathe.
Bend the soles. They should be flexible and gripping, not smooth and stiff. A non-skid rubber sole with ridges will offer good traction.
Check the fit. Have your child try on the shoes and stand up. There should be just enough room to squeeze your pinky between your child's heel and the heel of the shoe, and a full thumb-width between the end of your child's longest toe and the front of the shoe. The shoe should provide just enough wiggle room without being too big. Because baby feet grow quickly, it's a good idea to check every month to make sure the shoes still fit.
Give it a squeeze. If the shoe is made of soft fabric, try to grab some of the material on the top of the foot when your child is wearing them. If you can't, the shoes might be too tight.
Shop later in the day. Babies' feet swell and are often bigger at the end of the day. Shoes purchased in the morning might feel tight in the evening.
Look for problem spots. Your baby's shoes shouldn't need any breaking in. Let your child toddle around indoors wearing the shoes, then take them off and look for any irritated areas on your child's foot.
Make the choice: laces versus Velcro. Velcro fasteners make it easier to get shoes on and off, and you won't have to worry about retying laces all day. But a child may figure out how to remove his shoes and take them off when you wish he wouldn't! If you choose shoes with laces, make sure they're long enough to tie into double knots, so they won't come undone as often.
_________________________________________________________________________
When did your LO start to walk? What was his/her first pair of shoes?
So here he is....attempting to walk in and out of the kitchen.
Now that J is starting to walk, it's about time to get him some proper shoes. I went online to see if I could pick up some useful tips on choosing the right shoes for him, so I thought it would be good for me to share it here too!
__________________________________________________________________________
What to look out for when choosing shoes:
_________________________________________________________________________
When did your LO start to walk? What was his/her first pair of shoes?
Wednesday, October 2, 2013
Terrible 2 came EARLY??
Recently, J has been very attached to particular things and he won't want to be far away from them even when he is eating.
So, just 2 days ago, I've had the WORST morning with him. He was seemingly more unsettled that morning, tired but refused to nap. And he was just crying and screaming...Nothing I gave him worked, even with my singing, he screamed even louder. (singing usually keeps him very calm) Not even his favourite mineral water bottle. He's normally quite predictable. He wakes up in the morning, daddy showers him, has his breakfast, play and crawls around a bit and off he goes to nap.
Many of you reading this now probably think it sounds like a normal situation, but not so in the case of J. He's usually very mild-tempered, easy-going. He's very sociable and gets along with everybody. He doesn't even snatch other children's toys. However, it seems that a lot of his behaviours have changed since he turned 1 year old.
He's more assertive and wants things done his way. When he wants something and doesn't get it, he will cry. Sometimes, I'm really in a dilemma. On one hand, it's good that he knows what he wants...But on the other hand, how do I educate him that some things you need to have patience to wait or not everything he wants is necessarily good for him. He's after all only 13 months old! As a new mum, the learning curve is definitely a steep one. There are new things to learn every single day!
That morning I was so frustrated with J because I just didn't know what was going on with him. I had to let it out somewhere, so I decided to text my hubby to "complain". And he enlightened me! Boy was I glad I texted him! He told me to try giving J his blanket and so I did. Guess what?! My hubby was spot-on about the blanket. The moment I gave J his blanket, he smiled at me and he laid down to nap. It was a heart melt moment to see my little boy smile again!
At the moment, I felt so guilty for scolding him earlier and for not being able to understand his needs. When my hubby came home that evening, he told me sometimes when we are too involved, we miss out on certain details, which I totally agree.
The next day, I placed his blanket in his playpen and he held it while napping...our little happy boy is back! Yay!
So we decided to find out what exactly was going on with J and glad to find out that this is normal stage of development!
For those of you who are facing the same issue with your LO, the following websites might be of help to you:
(1) Tantrums: http://www.babycenter.com/0_tantrums_11569.bc
(2) Why Toddlers Throw Temper Tantrums: http://www.parenting.com/article/toddler-temper-tantrums?page=0,1
If you do have any tips on how to handle such situations, please do share with me. TIA
So, just 2 days ago, I've had the WORST morning with him. He was seemingly more unsettled that morning, tired but refused to nap. And he was just crying and screaming...Nothing I gave him worked, even with my singing, he screamed even louder. (singing usually keeps him very calm) Not even his favourite mineral water bottle. He's normally quite predictable. He wakes up in the morning, daddy showers him, has his breakfast, play and crawls around a bit and off he goes to nap.
Many of you reading this now probably think it sounds like a normal situation, but not so in the case of J. He's usually very mild-tempered, easy-going. He's very sociable and gets along with everybody. He doesn't even snatch other children's toys. However, it seems that a lot of his behaviours have changed since he turned 1 year old.
He's more assertive and wants things done his way. When he wants something and doesn't get it, he will cry. Sometimes, I'm really in a dilemma. On one hand, it's good that he knows what he wants...But on the other hand, how do I educate him that some things you need to have patience to wait or not everything he wants is necessarily good for him. He's after all only 13 months old! As a new mum, the learning curve is definitely a steep one. There are new things to learn every single day!
That morning I was so frustrated with J because I just didn't know what was going on with him. I had to let it out somewhere, so I decided to text my hubby to "complain". And he enlightened me! Boy was I glad I texted him! He told me to try giving J his blanket and so I did. Guess what?! My hubby was spot-on about the blanket. The moment I gave J his blanket, he smiled at me and he laid down to nap. It was a heart melt moment to see my little boy smile again!
At the moment, I felt so guilty for scolding him earlier and for not being able to understand his needs. When my hubby came home that evening, he told me sometimes when we are too involved, we miss out on certain details, which I totally agree.
The next day, I placed his blanket in his playpen and he held it while napping...our little happy boy is back! Yay!
So we decided to find out what exactly was going on with J and glad to find out that this is normal stage of development!
For those of you who are facing the same issue with your LO, the following websites might be of help to you:
(1) Tantrums: http://www.babycenter.com/0_tantrums_11569.bc
(2) Why Toddlers Throw Temper Tantrums: http://www.parenting.com/article/toddler-temper-tantrums?page=0,1
If you do have any tips on how to handle such situations, please do share with me. TIA
Tuesday, October 1, 2013
Peanut Butter ~ 120g
Ingredients:
1 cup red peanuts (with skin)
1 -2 tsp olive oil
(alt. vegetable, corn or canola oil)
½ tsp honey (*optional)
Method:
1. Preheat the oven to 175 degrees C.
2. Rinse the peanuts under cool water to remove excess
dirt. Pat dry and place them on a baking tray, making sure to spread them out
into a single layer.
3. Roast in the oven for 30 to 35 minutes, rotating the
pans halfway through cooking. 4. Once you remove the peanuts from the oven, let
them cool slightly before removing the skin. Remove the skin by rubbing the
peanuts together in your hands.
5. Place the peanuts
into a food processor. Process for 1 minute. Scrape down the sides of the bowl.
Place the lid back on and continue to process.
6. Slowly drizzling in the oil towards the end and
process until the mixture is smooth, 1 1/2 to 2 minutes.
7. Place the peanut butter in an airtight container and
store in the refrigerator for up to 2 months.
*Using a salad spinner: Rub peanuts together in hand
held over a salad spinner, allowing the peanuts and skins to fall into the
bowl. Once the skin has been loosened from all of the peanuts close the salad
spinner and spin until all of the skin has been separated from the peanuts
*The peanut butter can be used to make cookies
http://www.foodnetwork.com/recipes/alton-brown/homemade-peanut-butter-recipe/index.html
Saturday, September 14, 2013
Vaccinations
J went for his 1st dose of the MMR vaccination today, scheduled to be given when he turns 1 year old. It has been a long time since his last vaccination and I can definitely say that he has matured into a brave little toddler! Not that he didn't used to be brave, but this time he took it really well and he didn't even cry. After coming out from the vaccination room, he was so eager to get back to playing that we didn't even get a photo of him. He was too preoccupied with the toys at the play area in the clinic. :)
I think vaccinations are exceptionally important at this stage because babies are usually more susceptible to germs and diseases compared to adults.
Being overseas, scheduling the vaccinations is an added challenge for us. Every country has its own set of mandatory vaccines all babies have to take. However, different countries bring in their vaccines from various sources that may not be the exact one that your home country is offering.
Each time J is due for a vaccination, we will have to research on the internet or get the information through friends in Singapore on the name of the vaccines and its manufacturer. These are very crucial information as we do not want to risk having J take a vaccine that is of a different variant as what is required. We also try to ask to keep the vaccine's packaging, just for our own reference.
Sometimes, it may be a necessity to fly back as some vaccines may not be available in your host country, as in the case of the pneumococcal vaccine for J. It is compulsory for all babies in Singapore but not in Vietnam, so this is not available in the International clinics. Fortunately, Vietnam is only a 2h flight away from Singapore so we could make arrangements to visit our families and bring J for his vaccination.
Usually after a dose of vaccination, look out for signs of unusual irritability, rash or very high fever. If this happens, do consult your local paediatricians as soon as possible.
I think vaccinations are exceptionally important at this stage because babies are usually more susceptible to germs and diseases compared to adults.
Being overseas, scheduling the vaccinations is an added challenge for us. Every country has its own set of mandatory vaccines all babies have to take. However, different countries bring in their vaccines from various sources that may not be the exact one that your home country is offering.
Each time J is due for a vaccination, we will have to research on the internet or get the information through friends in Singapore on the name of the vaccines and its manufacturer. These are very crucial information as we do not want to risk having J take a vaccine that is of a different variant as what is required. We also try to ask to keep the vaccine's packaging, just for our own reference.
Sometimes, it may be a necessity to fly back as some vaccines may not be available in your host country, as in the case of the pneumococcal vaccine for J. It is compulsory for all babies in Singapore but not in Vietnam, so this is not available in the International clinics. Fortunately, Vietnam is only a 2h flight away from Singapore so we could make arrangements to visit our families and bring J for his vaccination.
Usually after a dose of vaccination, look out for signs of unusual irritability, rash or very high fever. If this happens, do consult your local paediatricians as soon as possible.
Thursday, September 12, 2013
Sensory Activity~ Painting
Recently, the term "SENSORY" came up very strongly to me. So I decided to go onto the internet to see what sensory activities I can do with J at home.
Given his young age, he does a lot of exploration using his senses, especially his sense of touch and taste. I came across finger painting on many webpages and thought it would be a great activity for him and decided to give it a try. I tried 2 different types of finger painting: Mess free painting and finger painting.
I knew painting would definitely get J all dirty and colours will be hard to come off the clothes. And so mess free painting was the best choice.
The materials can be prepared in less than 5 minutes and you are ready to start.
It was J's first time working with paint. The colours caught his attention. However, it was not long before he spotted the scotch tape surrounding the zip-lock bag and decided that was more interesting than painting. With J tearing off all the scotch tapes on the sides, it was the end of the painting activity. I reckon he probably didn't really understand what the objective of the activity was.
Anyway, tearing off the scotch tapes is also a form of sensory activity too. So, I thought maybe the activity was not messy enough for J, hence, I went in search for actual finger painting activity instead. Knowing that J will definitely give the paints a taste, I searched for recipes for an edible homemade paint.
I got on to mixing my paints and let J try again after he woke up from his afternoon nap. The colours that I mixed turned out great and most importantly it cost me very little compared to commercially produced ones and it's completely edible. I need not have to worry about J tasting them.
So this is J, getting his hands and clothes all tinted with paint. Overall, he again didn't really like the activity, probably because it's rather new for him. The "masterpiece" you see is 90% done by ME! He merely touched the paint in the corner of the paper and went on to colour the floor instead. Hee...As I expected, he tasted some but no expression from him, so I think it did not taste that good to him either. Those edible homemade paints...don't they just look so pretty! :)
I will definitely let him try again tomorrow since there are still more paints left and maybe this time he would be interested! Yeah...
At this age, it's not so much the final product that I hope to achieve but rather just exposing him to new things.
Given his young age, he does a lot of exploration using his senses, especially his sense of touch and taste. I came across finger painting on many webpages and thought it would be a great activity for him and decided to give it a try. I tried 2 different types of finger painting: Mess free painting and finger painting.
I knew painting would definitely get J all dirty and colours will be hard to come off the clothes. And so mess free painting was the best choice.
The materials can be prepared in less than 5 minutes and you are ready to start.
Anyway, tearing off the scotch tapes is also a form of sensory activity too. So, I thought maybe the activity was not messy enough for J, hence, I went in search for actual finger painting activity instead. Knowing that J will definitely give the paints a taste, I searched for recipes for an edible homemade paint.
I got on to mixing my paints and let J try again after he woke up from his afternoon nap. The colours that I mixed turned out great and most importantly it cost me very little compared to commercially produced ones and it's completely edible. I need not have to worry about J tasting them.
So this is J, getting his hands and clothes all tinted with paint. Overall, he again didn't really like the activity, probably because it's rather new for him. The "masterpiece" you see is 90% done by ME! He merely touched the paint in the corner of the paper and went on to colour the floor instead. Hee...As I expected, he tasted some but no expression from him, so I think it did not taste that good to him either. Those edible homemade paints...don't they just look so pretty! :)
I will definitely let him try again tomorrow since there are still more paints left and maybe this time he would be interested! Yeah...
At this age, it's not so much the final product that I hope to achieve but rather just exposing him to new things.
Saturday, September 7, 2013
Healthy Breakfast Food
In my attempt to make J's breakfast more interesting and healthy, I decided to make muffins. I saw a recipe shared by someone on facebook and thought I'll give it a try. However, the attempt was a failure (in my opinion); coz (1) I was on the phone and had forgotten to add in baking powder (terrible mistake) into the mixture before baking. (2) I did not blend the oatmeal fine enough, hence the mixture was very coarse and dry. It turned out looking and tasting okay, just didn't 'rise' but to me it was just not good enough for J. We fed him 2 small muffins the next day for breakfast...To our surprise, he polished off both of them!
And what happened to the rest of the muffins? Went straight to feed the rubbish bin. So, with this unsatisfactory baking and recipe, I was even more determined to find that perfect muffin recipe for J. And who did I find? Martha Stewart!!! Awesome recipe it was. But since I was making them for J and I didn't want him to consume too much additives, I made some changes to the recipe on my own.
So tada.....the finished product!
They came out perfectly golden brown and they were so fragrant! I was so pleased with them, I couldn't wait to let J try! Besides the wonderful smell, the sweetness was just right & they were so fluffy and moist on the inside. I was surprised and the best part of it, it didn't require rocket science to make them. Not only did J enjoyed the muffins, my hubby and I enjoyed them too and we will be having them for breakfast tomorrow! :)
So, if you want some healthy breakfast food for your little one, why not try these Healthy Banana Muffins.
And if you like the original Martha Stewart recipe, check out this link: http://www.marthastewart.com/345534/banana-muffins?search_key=banana%20muffin
And what happened to the rest of the muffins? Went straight to feed the rubbish bin. So, with this unsatisfactory baking and recipe, I was even more determined to find that perfect muffin recipe for J. And who did I find? Martha Stewart!!! Awesome recipe it was. But since I was making them for J and I didn't want him to consume too much additives, I made some changes to the recipe on my own.
So tada.....the finished product!
![]() |
| Healthy Banana Muffin - Big and minis |
They came out perfectly golden brown and they were so fragrant! I was so pleased with them, I couldn't wait to let J try! Besides the wonderful smell, the sweetness was just right & they were so fluffy and moist on the inside. I was surprised and the best part of it, it didn't require rocket science to make them. Not only did J enjoyed the muffins, my hubby and I enjoyed them too and we will be having them for breakfast tomorrow! :)
So, if you want some healthy breakfast food for your little one, why not try these Healthy Banana Muffins.
And if you like the original Martha Stewart recipe, check out this link: http://www.marthastewart.com/345534/banana-muffins?search_key=banana%20muffin
Subscribe to:
Posts (Atom)